How to Recreate Your Favorite IG Stories Filters With Makeup
July 27, 2020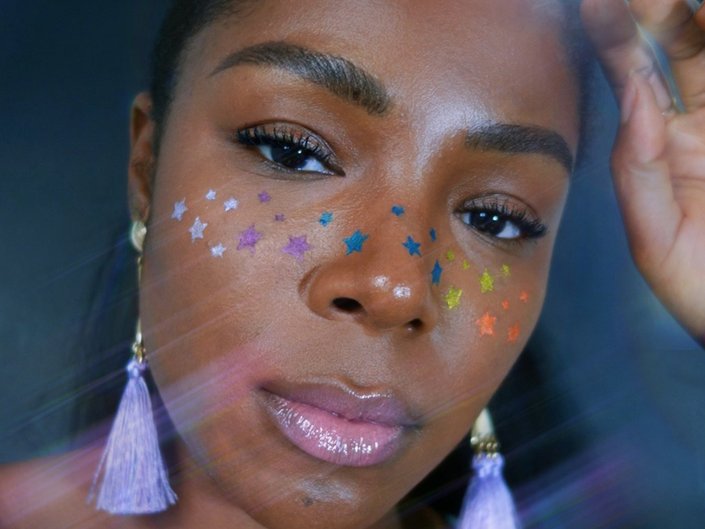
The Instagram Star Filter
-
STEP 1: Pick Out Your Pencils
After applying your foundation base, filling in your brows and fluffing up your lashes with mascara, choose colorful eyeliner pencils to play with. Williamson chose the NYX Professional Makeup Epic Wear Liner Sticks in Orange Zest, Chartreuse Flash, Turquoise Storm, Fierce Purple and Graphic Purple. These pencils are perfect because they’re super pigmented, easy to sharpen and won’t budge an inch once applied.
-
STEP 2: Use a Stencil
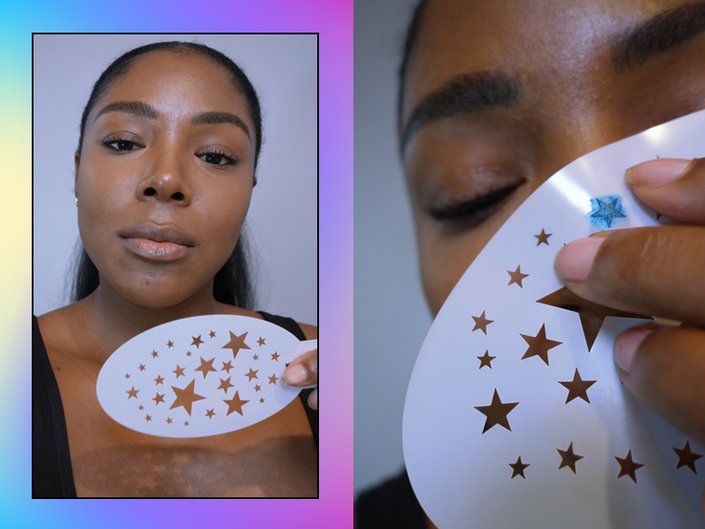
Next, Williamson used a star stencil to perfect her constellation. We recommend the Bad Ass Scattered Stars Mini Stencil from Amazon. “Start in the center of the face — on the bridge of the nose —when applying your stars,” she says. This will make it easier when you’re extending the stars outward onto each cheek.
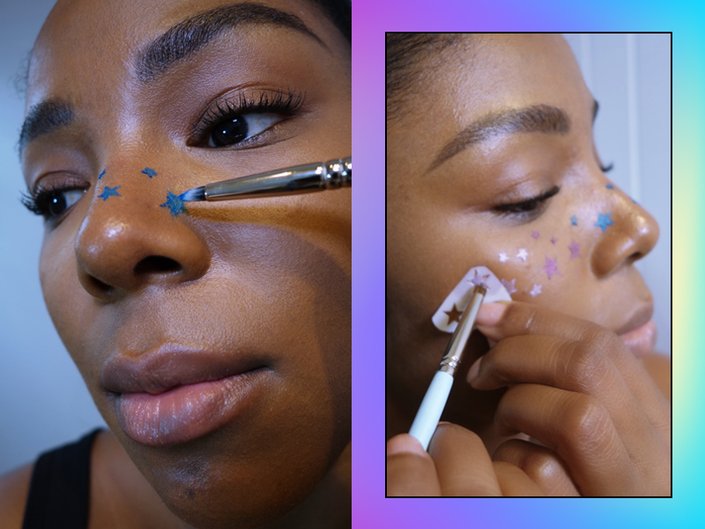
“Lie the stencil down firmly with the edges pressed onto the face so it’s as flat as possible,” says Williamson. Then, go in with Turquoise Storm, a bright electric blue, and fill in just the center of the star. Williamson suggests using a small tapered brush to blend out the liner and tp fill in each point of the star. “The tips of the stars are going to be hard to fill in on their own — so the brush is very important to have.”
![instagram filter makeup]()
-
STEP 3: Repeat As You Please
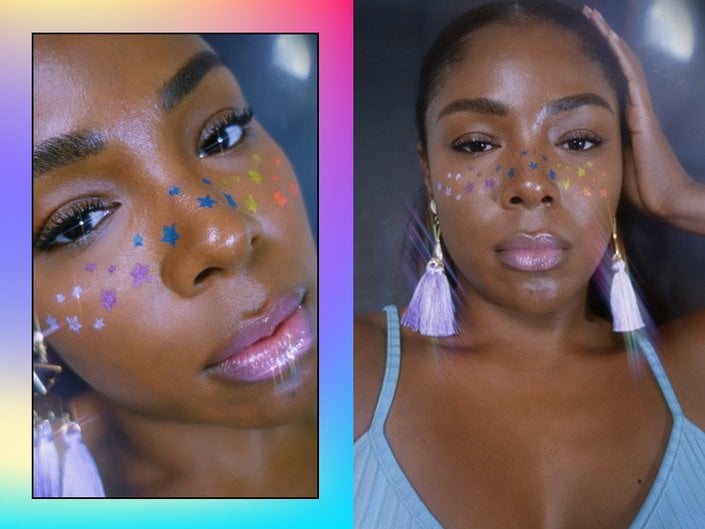
Williamson recommends doing two to three stars at once if you’re able to get the stencil to lie flat on the face and to clean it in between each use with a makeup wipe. She follows the same steps with Fierce Purple and Graphic Purple on the right side and Chartreuse Flash and Orange Zest on the left side. Once complete, clean up any stray marks with a small liner brush and your IG constellation is complete.
![instagram filter makeup]()
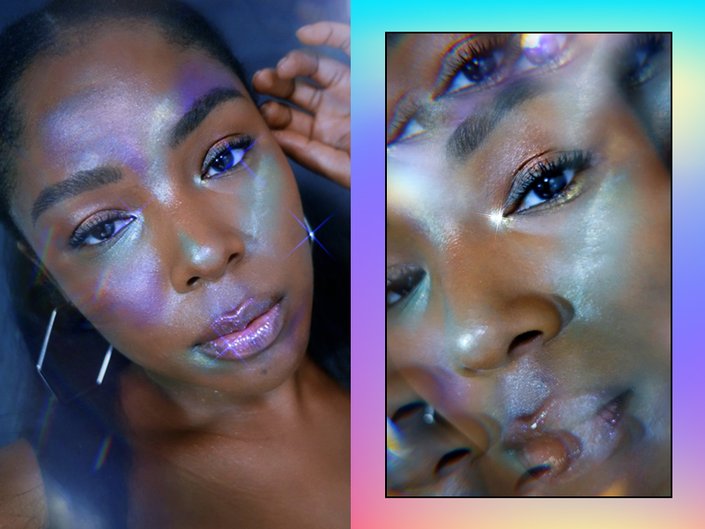
Instagram Holographic Rainbow Filter
-
STEP 1: Pick Your Rainbow Shades
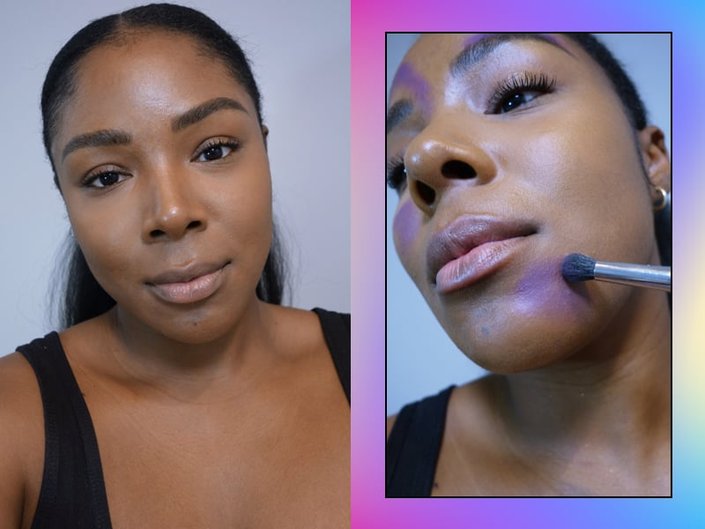
After you’ve applied your foundation, brows and mascara, pick up the Urban Decay Wired Palette to begin the holographic look. This collection of shadows is spot-on for this look because it has all the bright, neon and rainbow shades you need to replicate the filter.
-
STEP 2: Create Highlight
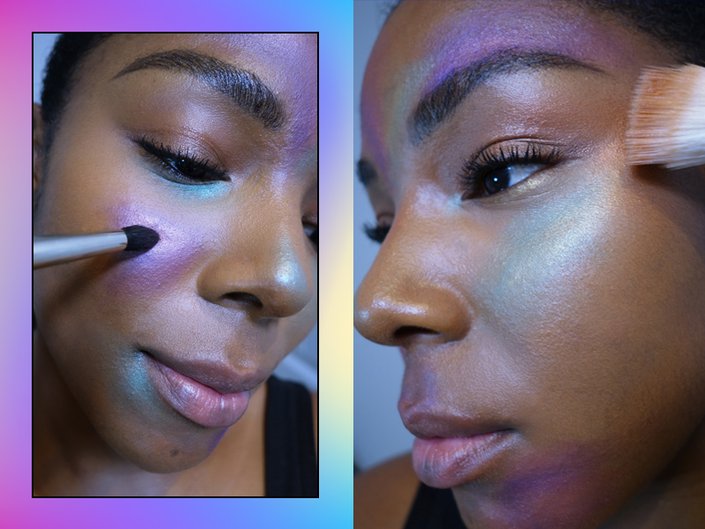
With a tapered brush, pick up Gravity, a bright purple and drag it along high points of your face, like on your forehead, cheeks and jawline. Next, add Current under the eye into the tear duct, onto the tip of the nose and onto the forehead. “Think about where the light naturally hits your face — this is where you want to add these base highlight colors,” says Williamson.
![instagram filter makeup]()
-
STEP 3: Punch It Up
Add lighter colors for more dimension on top of and around the colors you placed down. “Use a light pink shimmery shadow over top places where you placed Gravity and add Savage onto the edges,” she says. Next, add Fluorescent on top of and around the edges of where you placed Current. This will make the colors look a little punchier and really help mimic the rainbow holo effect. “Once you’ve done that, take a photo and look at where you’ve placed your color and where you can add some more color if you choose,” says Williamson.
![instagram filter makeup]()
-
STEP 4: Melt the Look Together
To complete the look, add a glassy sheen of bronze shimmer to the temples and down the nose to warm up the face and tie everything together. We recommend the NYX Professional Makeup California Beamin’ Face & Body Bronzer for this.


.jpg?cx=0.5&cy=0.5&cw=150&ch=120&blr=False&hash=7EFF884A993DEA3F5478073D512F8CFC)


