How to create Floating Eyeliner in 5 easy steps
May 03, 2024
What is Floating Eyeliner?
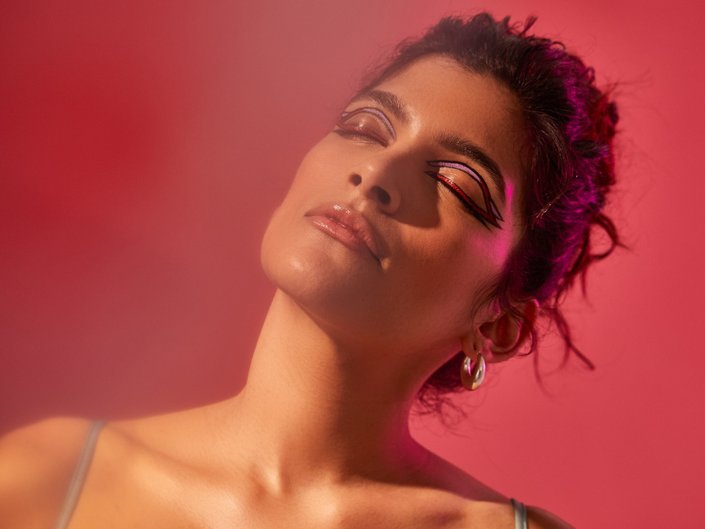
The floating eyeliner trend has rapidly gained popularity within the beauty industry for its unique and captivating effect. This innovative technique involves applying liner above the eyelid, resulting in a lifted and elongated eye shape. Whether seeking to elevate your everyday look or make a bold statement for a special occasion, floating eyeliner offers a versatile approach that can be tailored to individual preferences. In this comprehensive guide, we will provide step-by-step instructions for mastering this trendy makeup look, covering key elements such as selecting suitable eyeliner and experimenting with various styles. Prepare to elevate your makeup skills and captivate onlookers with this alluring eyeliner technique.
Mastering the Basic Technique
In this section, we'll walk you through the basic steps of mastering the floating eyeliner technique.
1. Prepare Your Eyes
Begin by prepping your eyelids with an eyeshadow primer or concealer. We recommend the Urban Decay Eyeshadow Primer Potion. This will help your eyeliner adhere better and ensure smooth application. Next, use a neutral eyeshadow to create a base for your eyeliner.
2. Choose the Placement
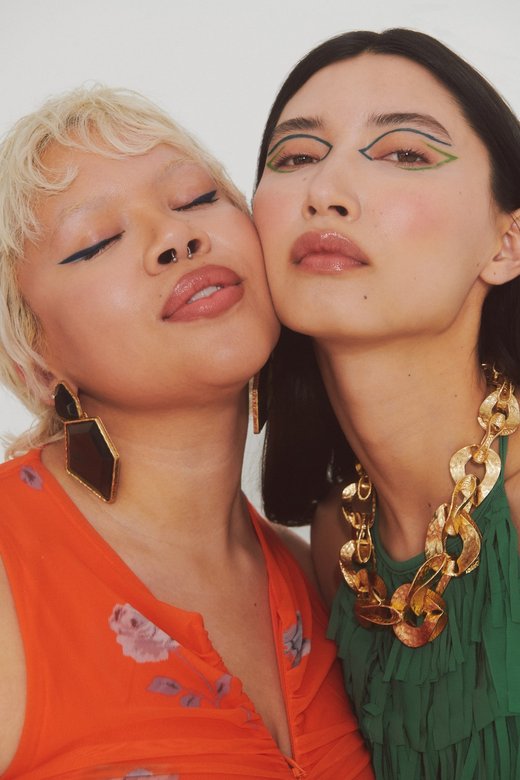
Floating eyeliner is all about placement. Since you don't have to focus on the outer corner, you can search for other flattering spots — this might be the inner corner, the crease or even the area just below the lower lash line. It's up to you to determine what looks best. For example, if you have deeper-set eyes, you may not have a lot of room between your brow and lash line, in which case a floating crease might not be as easily visible as a double floating wing on the outer corner. Playing with the placement is the best part — no two floating eyeliners look the same, so experimenting is encouraged.
3. Start Drawing
Take a deep breath and go for it. While some people like to move quickly in sweeping motions, it's also possible to start in sections. For any eyeliner look, it's usually best to work your way out; starting from the inner corner to the outer. First, lightly sketch out the shape of your desired eyeliner look using a pencil or a gel liner. This will allow you to make any necessary adjustments before committing to a more permanent product. Then, using a liquid or gel liner, trace over the pencil outline, starting from the inner corner and working your way out. Remember to keep your hand steady and your strokes precise for a clean and defined line.
4. Thicken the Line
Once you have drawn the initial line, go back and thicken it to your desired thickness. Use short, feathery strokes to build up the line gradually. This will give you more control and help prevent any mistakes or uneven lines. You can also use a small angled brush to blend and smudge the eyeliner for a more subtle and smoky look. We love the IT Cosmetics Superhero™ 4-in-1 Eye-Transforming Super Shadow and Liner Brush. Remember, it's always easier to add more product than to remove it, so start with a thin line and build it up as needed.
5. Clean Up Mistakes
Keep a fine synthetic brush and pointed cotton swabs around when cleaning up his looks. Because, yes, mistakes will happen and wobbly lines will be drawn, but there's nothing some micellar water can't fix. (We highly recommend the Micellar Cleansing Peeling Water with 1% PHA + Glycolic Acid). Dip the brush or swab into the product and carefully clean up any uneven lines or smudges. This will give you a clean and polished finish to your eyeliner look. Remember to be patient and take your time when correcting any mistakes, as rushing can often make the problem worse
Experimenting with Different Styles
The Double Threat
Go big or go home, right? This eyeliner look combines a soft floating crease with an equally soft wing, plus the added bonus of a double wing that extends from the inner corner all the way to the outer corner. A pigmented eyeshadow and a wet angled brush could get you a similar look, but if you want to be quick about it, grab a NYX Jumbo Eye Pencil and achieve that smooth line above the crease. This look is perfect for a night out or a special event, and the best part is, you can easily switch up the colors and create a whole new look with just one product. Don't be afraid to experiment with different styles and have fun with your
Example of The Double Threat:
64dd.jpg)
The Double Wing
The negative space a double wing creates technically qualifies it as floating eyeliner. To create a clean, sharp line, we recommend the Idôle Felt Tip Precision Liquid Eye Liner for an ultra-pigmented option that makes a dramatic impact and will last all day.
Example of The Double Wing:
6738.jpg)
The Colorful Crease
As if floating eyeliner wasn't eye-catching enough, it's even better with bright color. If bold is your style, consider recreating this floating crease using a bright pencil eyeliner (we love the NYX Vivid Brights Colored Liquid Eyeliner to color block against your shadow. This colorful crease trend takes the classic winged eyeliner to the next level by incorporating a pop of color. It's a fun and playful way to add some personality to your makeup look.
The Geometric Wing
Halo eye makeup usually entails a mix of shadows, but we're campaigning for this negative-space remix instead. What makes a halo effect work is that you focus the makeup on the inner corner and the outer corners, so your eyes really pop. For this colorful twist, choose two differing shades, one for the inner corner and one for the outer corner. Create a sharp line in the crease of your eyelid with the inner corner color, then create a sharp line from the outer corner to the middle leaving a gap in the middle. This negative space creates a unique and modern twist on the traditional halo eye look. We recommend the Maybelline Master Precise All Day Liquid Eyeliner to get the best pop for your eyes and achieve this look !
Example of Geometric Wing


c00c.jpg)


